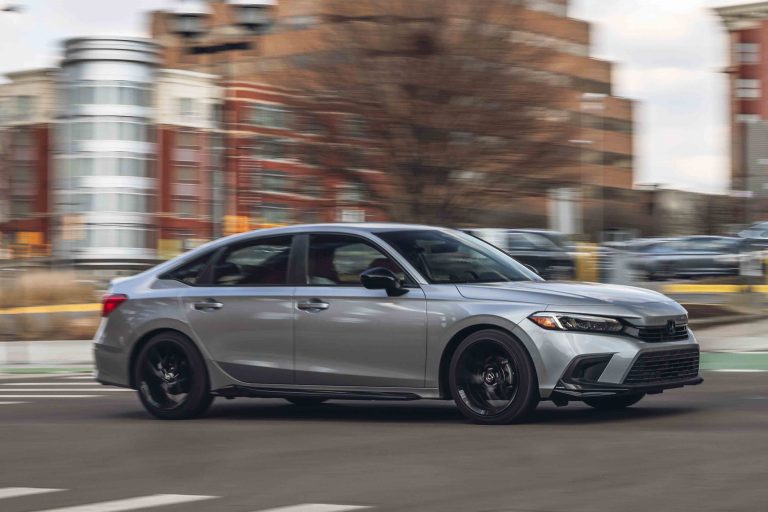
How to Fix Uneven Spray Paint on Car: Expert Tips for a Flawless Finish
Fixing uneven spray paint on your car can be a frustrating experience, but with the right techniques and some patience, you can achieve professional-looking results. Uneven spray paint is a common problem, especially for those who are new to DIY car paint jobs. But don’t worry—you can correct these imperfections and get your car looking good as new with a few simple steps.
To begin, it’s essential to understand what causes uneven spray paint in the first place. The issue often occurs when improper coats are applied, or there’s a lack of surface preparation. Luckily, there are straightforward solutions to help you refresh your car’s paint job, such as sanding, priming, and applying paint in thin, even coats.
In this article, you’ll learn how to tackle uneven spray paint on your car, from preparing the surface to applying the final clear coat, ensuring a smooth and even result. Armed with these tips and tricks, you’ll be able to transform your car’s appearance and restore its original shine.
TLDR Summary
Fixing uneven spray paint on your car can be achieved in just a few steps. First, you’ll want to sand the affected area smooth using medium or fine-grit sandpaper. This will help to remove any texture left behind by the uneven paint and prepare the surface for a new coat.
Next, give the area a thorough cleaning with soap and water or a degreaser. Making sure the surface is clean and free of debris is essential for a smooth and even paint application.
After the surface is clean, you may need to apply a primer. This helps even out the texture and provides a better surface for the new paint to adhere to. Allow the primer to dry completely before moving on to the next step.
Now it’s time to repaint the area. Apply the paint in thin coats to ensure even coverage and avoid adding too much paint at once, which can lead to further unevenness. Be patient and give the paint ample time to dry between coats.
Finally, to protect your fresh paint job, consider applying a clear coat. This adds an extra layer of protection and gives your car’s finish a polished and professional look.
Remember to:
- Sand the area with medium or fine-grit sandpaper
- Clean the surface with soap and water or a degreaser
- Apply a primer if needed
- Use thin coats of paint for even coverage
- Allow paint to dry between coats
- Protect the new paint with a clear coat
By following these steps, you can easily fix uneven spray paint on your car and restore it to a smooth and even finish.
Identify the Problem Area
When dealing with uneven spray paint on your car, the first step is to identify the problem area. This will help you determine the best course of action to fix the issue. In this section, we will discuss common types of uneven paint and how to assess the severity of the problem.
Common Types of Uneven Paint
There are a few different types of uneven paint you might encounter:
- Runs or drips: This occurs when paint is applied too heavily, causing it to run down the surface or pool in certain areas.
- Orange peel: This is a textured, rough-looking surface that resembles the skin of an orange. It’s caused by paint that has not properly leveled and dried.
- Bubbles or pinholes: These small imperfections are created when air gets trapped under the paint during application.
Assessing the Severity
To assess the severity of the uneven paint on your car, you should examine the area closely. Consider the following factors:
- Size of the affected area: Larger areas might require more extensive repair work than smaller ones.
- Depth of the uneven paint: Uneven paint that is very thick or has multiple layers may be more difficult to fix than a single layer.
- Location on the car: Some areas, like body panels and doors, are more visible and might require extra care during repair.
Once you have identified the problem area and assessed the severity, you are better equipped to determine the appropriate method for fixing the uneven spray paint on your car. By addressing the issue as soon as possible, you can protect your car’s appearance and help maintain its value.
Preparation for Fixing
Gather Necessary Materials
To efficiently fix uneven spray paint on your car, start by assembling all the required items. You will need:
- Bucket of water
- Dish soap
- Microfiber wash mop or brush, or a standard sponge and cloth
- Wire brush
- 1000 grit sandpaper, or a compressed air pump sander for better results
- 3-7 cans of spray cans or a spray gun and paint (use latex paint for simpler repair jobs and a stronger finish for more challenging projects)
Having all the materials at hand will save you time and make the process seamless.
Clean the Affected Area
Before diving into the actual fixing process, it is very important to thoroughly clean the surface. Follow these steps to ensure the area is spotless:
- Fill a bucket with water and add some dish soap to create a cleaning solution.
- Use a microfiber wash mop, brush, or sponge to clean the affected area. This will help remove any dirt, dust, or grime that could interfere with the fixing process.
- Rinse the surface with clean water to remove any residue from the cleaning solution.
- Gently wipe the area dry with a clean cloth.
Once the surface is clean and dry, you are ready to begin fixing the uneven spray paint on your car. Follow these steps diligently for an excellent finish that resembles a professional job.
Sanding the Uneven Surface
Choosing the Right Sandpaper
When it comes to fixing uneven spray paint on your car, choosing the right sandpaper is essential. Here are some suggestions:
- For initial sanding, use medium-grit sandpaper like 600 grit.
- For fine sanding and smoothing out imperfections, switch to fine-grit sandpaper like 1000 or 1200 grit.
- For final sanding before applying new paint, opt for ultra-fine-grit sandpaper like 2000 grit.
Remember to keep the sandpaper wet during the sanding process to avoid damaging your car’s surface.
Proper Sanding Technique
Follow these simple steps to ensure a proper sanding technique:
- Clean the uneven spray paint area by washing it with soap and water or using a degreaser. This removes any grime, grease, and contaminants that might interfere with your sanding.
- Soak the appropriate sandpaper in a bucket of water for about 10-15 minutes before using it. This helps reduce friction and prevents damage to the car’s surface.
- Begin sanding the uneven area with medium-grit sandpaper, applying gentle pressure and using circular motions. Be patient and work slowly to prevent causing additional damage.
- Wipe the area with a damp cloth regularly to remove any residue and check your progress. This helps you see if there are any remaining imperfections that need to be addressed.
- Switch to a finer grit sandpaper if needed, continuing the sanding process until the uneven surface is smooth and the imperfections have been addressed.
- Once the area is smooth, clean it thoroughly with water and a clean cloth. This prepares the surface for the next steps, such as applying primer and repainting.
By following these guidelines and using the right sandpaper and proper sanding technique, you can fix the uneven spray paint on your car effectively and efficiently. Happy sanding!
Applying Primer
Selecting Primer for Your Car
When preparing to fix uneven spray paint on your car, it is very important to choose the right primer. The type of primer you need depends on the condition of your car’s surface and the type of paint you will apply later. Ask yourself these questions: Is the surface smooth or rough? Is it bare metal or already painted? If painted, what type of paint is on it? Considering these factors will help you choose the appropriate primer for your situation.
Here are some common types of primers and their uses:
- High-build primer: Great for filling small imperfections on rough surfaces.
- Self-etching primer: Specially designed for bare metal, providing better adhesion and preventing rust.
- Primer-sealer: Best for covering existing paint and providing a smooth, even base for the new paint.
Proper Primer Application
After selecting the appropriate primer for your car, follow these steps for a smooth and even application:
- Clean the surface: Use a cleaning solution or degreaser to remove any dirt, dust, or grime from the area where you will apply primer. Wipe it down with a clean cloth afterward.
- Sand the surface: Smooth out the imperfections on the car’s surface with fine-grit sandpaper (220-grit or finer). This will help the primer and paint adhere better.
- Protect surrounding areas: Cover the areas around the spot that you don’t want to get paint on, using masking tape and paper or plastic sheeting.
- Apply the primer: Hold the primer can about 8-12 inches away from the surface and use a sweeping motion to evenly coat the area. If needed, apply more than one coat of primer, allowing each coat to dry for the recommended time on the primer’s label.
- Sand the primer: Once the primer is fully dry, lightly sand the area with fine-grit sandpaper to ensure a smooth, even surface for the new paint.
Remember to work in a well-ventilated area and wear appropriate safety gear, such as a mask and gloves, during primer application. With these simple steps, you’ll be on your way to fixing the uneven spray paint on your car and achieving a professional-looking finish.
Re-Spraying Paint
Choose Compatible Paint
When fixing uneven spray paint on your car, it is very important to choose compatible paint. Ensure the paint you select matches your car’s original color and type to achieve the best results. Some safe choices include using latex paint for easier repairs, or opting for a strong finish for more demanding projects. To find a perfect match, refer to your car’s paint code, which is usually found on a sticker or plaque located on the door jamb or engine bay.
Using Correct Spray Technique
To achieve an even paint job, follow these guidelines for the proper spray technique:
- Shake the paint can well for at least 1 minute before spraying. This helps to mix the paint and prevent a mottled surface.
- Hold the spray can at a distance of 8 to 12 inches from the surface. Spraying too closely or too far away can result in uneven coverage.
- Spray in a consistent side-to-side horizontal motion, maintaining an even pressure on the nozzle. This ensures an even deposition of paint on the surface.
- Use a swirling or rotating motion when spraying metallic paints to ensure that the metal particles are evenly deposited on the surface.
- Allow each coat of paint to dry completely (as per the manufacturer’s recommendations) before applying the next coat.
By carefully choosing the right paint and employing the correct technique, you can effectively fix uneven spray paint on your car and achieve a professional-looking finish. Remember, patience and practice are key when it comes to perfecting your car’s paint job.
Final Touch and Protection
Applying Clear Coat
After fixing the uneven spray paint on your car and ensuring the paint has dried completely, it’s time to protect your hard work. Applying a clear coat is a vital step in providing a glossy finish and protecting the paint from various elements, such as UV rays and scratches. To start:
- Clean the area again using a microfiber cloth to remove any dust or debris.
- Shake the clear coat can well and test it on a sample surface.
- Spray the clear coat in thin, even layers onto the painted area. Hold the can about 8-12 inches away from the surface and use smooth, sweeping motions.
- Allow each coat to dry for about 15-20 minutes before applying the next one. Aim for at least 2-3 coats of clear coat for optimal protection.
- Let the final coat dry completely for a full 24 hours before moving on to the next step.
Buffing and Polishing
Once the clear coat has dried, it’s time to give your car a stunning finish by buffing and polishing. This step will remove any minor imperfections and give your car a smooth, showroom-like appearance.
- Start by wet-sanding the clear coat with 2000 grit sandpaper. Make sure to keep the sandpaper and the area wet during this process. Gently sand the area until all visible imperfections are smoothed out.
- Next, apply a small amount of rubbing compound to a foam or microfiber polishing pad. Work the compound into the clear-coated surface using a circular motion and light to medium pressure. Make sure to frequently check your progress to avoid over-working the area.
- Wipe away the rubbing compound residue with a clean microfiber cloth, and then polish the surface using a clean polishing pad and a fine polishing compound. Move in circular motions, overlapping each area slightly.
- Finally, wipe away any remaining residue with a clean microfiber cloth and admire your freshly restored paint job.
Following these steps will ensure a smooth and protected finish for your car, leaving it looking like new again. The combination of clear coating, buffing, and polishing will help maintain the durability and appearance of your vehicle’s paint for years to come.
Wrap Up!
Fixing uneven spray paint on your car might seem challenging, but with the right steps and some patience, you can get your car looking great again. Start by sanding the area smooth, using medium or fine-grit sandpaper. This ensures a smooth surface for the new paint to adhere to.
Next, you should clean the area with soap and water or a degreaser, making sure that any dirt or oils are removed before repainting. This will help in achieving an even finish and preventing further issues.
Applying a few coats of primer might be necessary, especially if you’re working on a large or heavily damaged area. This provides a solid base for the paint to stick to and helps with better color coverage.
Once the primer is dry, repaint the area with careful and even strokes to avoid creating new uneven spots. Always use the right type of paint and spray equipment for your specific car model, and follow the manufacturer’s recommendations.
After repainting, a clear coat application is necessary to protect the new paint and maintain its shine. This final layer ensures that your newly painted area will be resistant to wear and tear.
Just remember, practice makes perfect. If you’re new to painting cars, try working on smaller areas first to develop your skills and techniques. You’ll be on your way to a flawless finish in no time!